


Simulating Wood Grain
Scale Park Pilot
By Rob Caso | [email protected] As seen in the Summer 2023 issue of Park Pilot
I previously wrote about this topic in the Winter 2017 issue of Park Pilot. The primary takeaways from that article were to use artist oils or enamels over an acrylic base, masking off areas during the process to represent the various wood panels of the real thing. I have since come up with another idea that I feel is even easier to do—and maybe faster.
Okay, here’s the punchline: nitrate dope tinted with powdered pigment.
I decided to experiment on a simple World War I model with this technique, with the fuselage of the prototype having plywood skinning covering approximately a third or so back from the cowling. My goal was also to have a rather rough “get it in the air” finish, so after leveling the sheet balsa surface, I did not take too much care in eliminating sanding scratches. If you intend a neater appearance, finish-sand the model with the grain, using increasingly fine sandpaper and making sure that there are no deep scratches or gouges.

Subtle variations in wood tone were achieved by sanding through the base color coats and later applying black pigment.
I was careful to keep glue off of the surface during construction because cured adhesive will not soak up the tinted dope and will result in white spots in the finish. On my model, I did not fill the longitudinal joints between the sheet planking, thus representing horizontal panels. I also ran a file vertically on some long panels to imply more than one piece was used to skin the airplane.
When you’re happy with the skin, use a fluffy 1.0- inch brush to apply one to two coats of clear nitrate dope thinned approximately 30%, and follow each with a light sanding. I then added a small amount of pigment to the dope. You can add more later for certain effects, so don’t overdo it on the first pass. The amount of dope already present on the surface affects the amount of color the wood absorbs with later coats. The pigment was obtained online, and some of the available sets have a number of colors to help achieve different wood tones.

The pigment will occupy the low spots in the surface, including any cross-grain sanding scratches
After the first coat of pigmented dope, sand most of it off and brush on another pigmented coat. This will darken areas that have some remaining color and will re-stain areas that were sanded through. Successive coats keep darkening the effect. Don’t like it? Sand it off! The beauty of this technique is that since the dope dries so fast, you will be able to sand and recoat almost immediately.
It was at this point in the process that I used an awl to make indentations in the skin to represent nail holes. I then rubbed in some dry black and brown pigment and wiped off the excess with a damp cloth. After this, clear dope was applied to lock in the powder then sanded down. This process enhanced the surface detail, the panel lines, and the wood grain. The pigment can also be mixed with water, brushed on the model, and then wiped off.

Nail holes were continued up single panels to represent the attachment to an underlying bulkhead.
I decided to stop the color at this point and continued with a number of coats of clear dope until the surface had a nice, semigloss finish. While I didn’t do it on this model, my panel “mask and paint” process described in my original article can also be used.
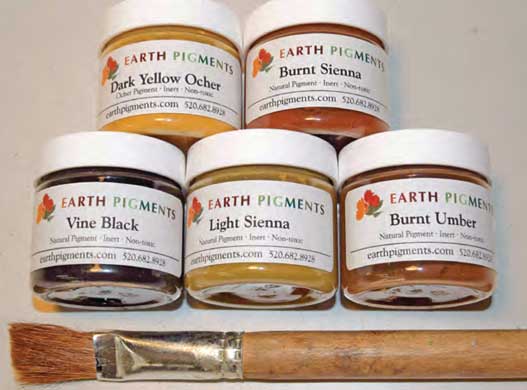
These are the primary colors to be used for wood tone, although the set Rob Caso purchased had 12 colors.
I didn’t use any filler on the skinned areas, so the only remaining question was how this would accept the pigmented dope. Water-based fillers are fairly porous and would easily mix with the pigment, so I would try some filler tinted to match the color of the bare balsa, and then go from there. Above all, however, make sure your woodwork is good to start—level with tight joints.

The elevator was covered with Polyspan and finished with a coat of dope tinted with yellow ocher.
With model paint being mostly limited to acrylics these days, this is a good workaround.


