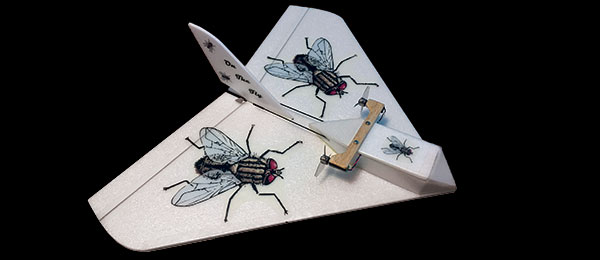
Designed by Andy Reynolds. Free plans from Winter 2014 Park Pilot.
The Taube (German for “dove”) was a pre-World War I monoplane and Germany’s first mass-produced military aeroplane. Igo Etrich designed the prototype Taube in 1909, although many variants produced by different manufacturers followed. Despite the name and birdlike appearance, the Taube’s wing was actually based on the seed of the zanonia, which floats to the ground in a slow spiral.
My foamie design is loosely based on the original Etrich Taube, and stretched a bit here and there as needed for better flying. The original Taube used wing warping, and my design has ailerons.
Get started by printing the plans, cutting out the paper templates roughly 1/8-inch outside the lines, then taping them to your 3mm Depron foam sheet. Use a metal straightedge and a hobby knife with a fresh No. 11 blade to cut out the internal notches in the vertical fuselage. Cut the servo-mount recess in the center of the wing, sizing it for a snug fit to your servo.
Cut out all of the foam parts, making sure the front of the fuselage parts where the motor will mount are cut accurately. Foam quickly dulls blades, so be sure to keep a supply of new ones on hand.

Protect your work surface with wax paper, parchment paper or Great Planes Plan Protector. Epoxy 3mm x 1mm carbonfiber strips to the trailing edge of the wing, the straight part of the leading edge of the wing, and the trailing edge of the horizontal stabilizer. Use masking tape to hold the strip to the foam, and lay the parts on a flat surface to cure.
Press the aileron servo into the cutout in the wing with the servo arm forward and on top of the wing. Secure the servo with hot glue. Use the radio to center the servo. Attach the arm so it’s straight across.
Lay the vertical fuselage flat on your protected building surface, and insert one of the horizontal sides into the slots. Use a square to make sure the front edges of the parts line up and the horizontal part is at a right angle. Glue the parts using foam-safe CA and accelerator, but do not add the other horizontal side yet.

Insert the wing into its slot. Use a ruler to make sure it’s centered. Note that the servo cutout in the horizontal fuselage may need some minor trimming to fit your servo. With the wing centered, measure from the wingtip to the tail on both sides to ensure that the wing is straight.
Hold the wing flat on the horizontal fuselage, and use foam-safe CA to bond the wing to it. When dry, flip it over and run a bead of CA between the bottom of the wing and the horizontal fuselage. Now add the other horizontal fuselage piece, making sure it’s aligned with the front of the fuselage. Bond it with foam-safe CA.
Cut or sand a 45-degree bevel into the left side of the rudder and the bottom leading edges of the elevator and ailerons. Hinge the right side of the rudder with Du-Bro Park Flyer Hinge Tape. Fold the rudder back over the right side of the fuselage, and tape the left side to secure the rudder.

Slide the horizontal tail over the rudder and vertical fuselage, on top of the horizontal fuselage parts, all the way up until it contacts the back of the wing. Glue the horizontal tail to the other fuselage parts with foam-safe CA.
Hinge the top side of the elevator. Flip the model over, fold the elevator back as far as possible, and add a bit more tape on each end to secure the elevator. Repeat the hinging process for the ailerons.
Cut or sand a 45-degree bevel on each long edge of the fuselage diagonal braces. Position a brace on each side of the fuselage, centered between the wing’s
trailing edge and the leading edge of the rudder. Use foam-safe CA to attach the braces on each side of the fuselage.
Add extra patches of foam to strengthen the areas of the fuselage and wings where the landing gear legs mount. A 3mm rectangle on each side of the vertical fuselage and a stack of two 3mm foam pieces on the bottom of the wing at the locations indicated will do nicely.

Cut a 2-inch length of .032 music wire. Make a slight bend 3/8 inch from one end for the axle, and bend the rest in half to prevent the wire from rotating when it’s attached to the landing-gear leg. Cut an 8-inch length of 2mm carbon-fiber rod for the leg. Position the wire with the axle at the end of the leg, and wrap the wire to the leg with thread. Saturate the thread with thin CA and repeat for the other leg.
Punch a pair of angled holes through the foam reinforcements in the vertical fuselage so the legs can pass through and into the reinforcement blocks in the wing. Push the ends of the legs into the blocks, but not all the way through the wing. Make sure the axles are parallel to the wing and to each other, then apply epoxy to the points where the legs pass through the fuselage and into the wing. When the epoxy is cured, adjust the angles of the axles so the wheels will be vertical.
Mount the Du-Bro control horns inside the inner edge of the control surfaces. Use .032 music wire for the aileron pushrods. Make a Z-bend at the servo end, and an L-bend at the other end. Hold it with a Du-Bro Micro E/Z Link.

Add a few extra blocks of foam at the nose, aligned with the front edge, to give additional gluing surface for the motor mount. Cut a 1-1/2-inch square of 1/16- inch plywood, then drill holes to mount your motor. Center the plywood on the nose of the fuselage and bond it with epoxy or hot glue, then mount the motor.
Use masking tape to temporarily position your electronics on the bottom of the fuselage. The tail servos should be just behind the wing. Lay a length of carbonfiber rod over the tail to simulate the weight of the pushrods that will be added. Balance the model roughly 2-7/8-inch behind the leading edge. When all of the components are positioned properly, mount them with Du-Bro Hook & Loop Material. Hot glue the tail servos to the bottom of the horizontal fuselage with the servo arms hanging over the edge.

Add the control horns to the right side of the rudder and top of the elevator. The elevator horn must be 1-1/2 inches out from the fuselage to prevent bumping the rudder. Center the servos and hold the control surfaces centered with tape.
Cut lengths of 2mm carbon-fiber rod slightly shorter than the distance from the servo arms to the control horns. Make a Z-bend at the end of four 2-inch lengths of .032 music wire for the pushrod ends. Slip a length of heat-shrink tubing over the rod and wire at each end, and shrink it tight. Be sure to protect the foam with cardboard if you use a heat gun. Wick a drop of thin CA into each piece of tubing to secure the wire inside the tubing.
With its huge control surfaces, the Taube is extremely agile in flight. I maxed out my control throws and added 25 percent exponential, but I rarely use full stick deflections. At only 5 ounces, the Taube can handle a bit of wind, but not a lot. Watch your downwind speed or you’ll really see this dove flap its wings.

The Taube is extremely agile in flight.

Click here to download your free Taube Build It Plans.
SPECIFICATIONS AND REQUIREMENTS
Type: Cartoon-scale monoplane
Skill level: Novice builder/intermediate pilot
Wingspan: 30.2 inches
Wing area: 157 square inches
Length: 18.5 inches
Weight: 5 ounces
Wing loading: 4.6 ounces/square foot
MATERIALS
- One sheet 3mm Depron foam
- 1/16-inch plywood motor mount
- Du-Bro Micro Control Horns
- Du-Bro Micro E/Z Links
- 3mm x 1mm carbon-fiber strip
- 2mm carbon-fiber rod
- .032 music wire
- Du-Bro Park Flyer Hinge tape
- Heat-shrink tubing
- Suppo A2204/14 1400kv brushless motor
- GWS 7 x 3.5 propeller
- GWS 1-1/2-inch ultralight wheels
- 350mAh 2S LiPo battery
- Hobby King HK-10A ESC
- Spektrum AR6110 receiver
- Two 5-gram servos
- One 9-gram servo