Written by Keith "Sparky" Sparks Building with Foam How-to As seen in the February 2016 issue of Model Aviation.
Editor's note: This article was originally published in Model Aviation magazine. My last article (in the October 2015 issue) was about using sheet foam construction to build RC models. In this article, I will discuss slab construction. Slab construction uses thick sheets of foam to form a fuselage in two halves, or to build a box and shape the outside to suit your needs. In either case, formers and stringers are not needed, saving time and weight. Even when you consider the need for cutting templates or time spent sanding, the fuselage will take shape faster than with other methods, and in many cases, it will be lighter.
This construction method gets the job done with only a few parts. It gives you fast, visual progress, but with the downside of having to plan component installation in advance.
Finding the foam material you need could be a challenge for those in rural areas. Thick sheets of extruded foam are commonly used for insulation and can be found in or ordered through home improvement stores. Another surprising source for thick foam is concrete suppliers. The material is used to construct concrete forms. Check with construction sites as well. When the concrete is dry, the companies have no use for it. You need a three-view drawing of the fuselage you want, printed to the size you need to get started. Transfer the model’s side view to a sheet of foam and cut it free, keeping the bottom edge flat. Use that sheet as a pattern to cut another.

Getting started. A three-view drawing printed to the desired size is the starting point. Any available cross-sections help greatly when the shaping starts.
Apply drops of epoxy along the model’s centerline to hold the slabs together. Keep in mind that one drop of epoxy will make a bond area that is roughly the size of a dime, so keep the drops away from the edges. Most scroll saws used in our hobby have a cutting height of approximately 4 inches. This is too short for what you need to cut thick pieces of foam. You could cut the halves and then bond them, but this does not help when it is time to cut the top-view profile. The solution is a hot-wire cutter configured like a band saw. This tool is easy to make. The wire is supported above the table and threaded through a small hole with a weight, keeping tension on the wire. Apply direct current power to the wire and you are in business.
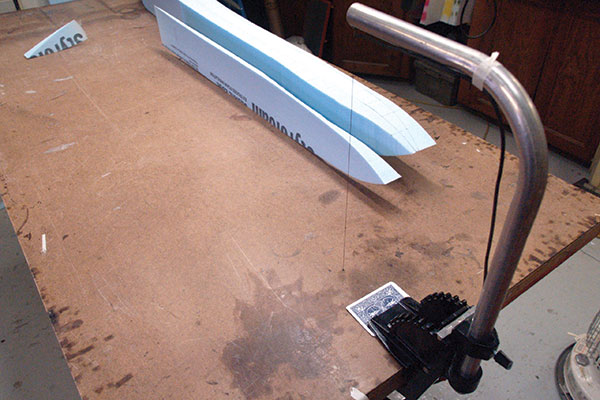
Hot wire cutting. Using a hot wire to cut thick foam is an affordable alternative to other cutting tools you could use. This hot-wire cutter was made with a discarded trolling motor base and a lawn chair leg.
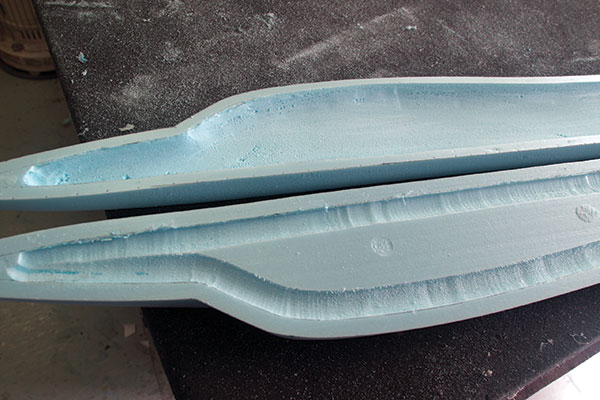
Cut the side view and retain the bottom. It is needed to keep the fuselage square while cutting the top view. Sanding is one subject that many modelers dread, but extruded foam sands easily. The trick is selecting the correct grit and how you use it. I start with a sheet of 90-grit sandpaper folded and bonded with spray adhesive. This folded paper gives my hand a good, firm grip while the other side quickly removes material. Wearing a garden glove will protect your hand while sanding. Use moderate pressure to sand off the corners. Counting your sanding strokes as you work one side and the other will keep the sides close to being shaped the same. Keep photos handy of your subject taken at different angles. As you get close to the final shape, reduce the grit, finishing with 180 grit. When the foam is the shape that you want, the fuselage will need to be hollowed to make it lighter and for equipment to fit inside. The best way to separate the fuselage halves without damaging the mating surfaces is to pull SpiderWire fishing line in between each half to upset the spot bonds. You might notice a bow in the fuselage halves. This is because you have relieved stress in the outer foam surface.
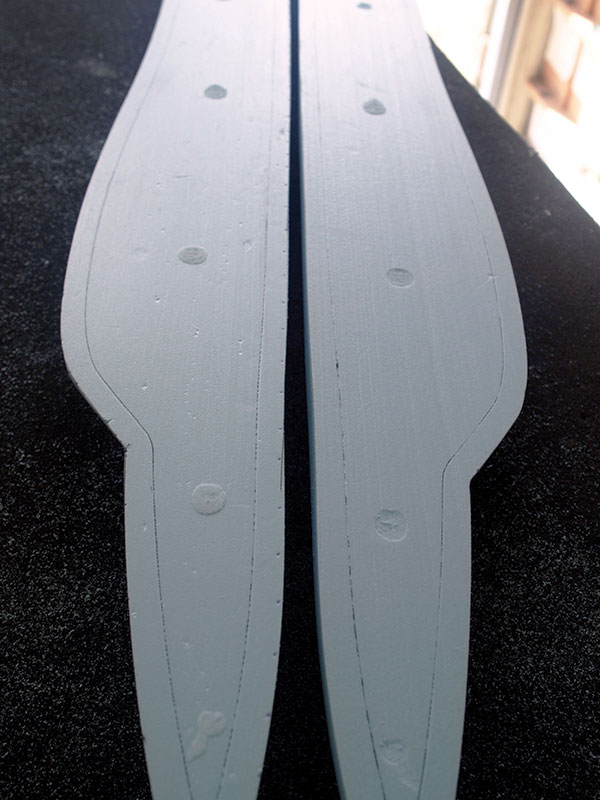
Separating the fuselage. While holding fishing line taut, push it into the parting plane of the fuselage at one of the ends. After it reaches the bond, anchor the line in one hand and pull down in the direction of the parting line to upset the bond. Continue until the fuselage is separated.
The next step is to hollow the fuselage to balance the stress. An assortment of rotary files will make quick work of removing foam from the inside of the fuselage. Although it might be a messy task and best done outdoors, the accuracy that this tooling provides is worth it. I start by drawing a line a 1/2 inch from the edge. This line sets up the overall fuselage skin thickness and is about right for models with a wingspan of 3 to 4 feet. Removing small amounts with each pass will prevent the bit from chattering. After you establish the fuselage edge, removing foam from the middle progresses quickly. A patch of 90-grit sandpaper is used to remove the lumps in the inner surface. Stroking the foam in one direction removes the material faster.
Hollowing the fuselage. After you establish the skin thickness, visual progress quickly picks up. More aggressive cutting tools can be used to remove the material in the middle. Switching back to the smooth cutting tool when the skin becomes uniform will help you avoid mistakes.
Holding the fuselage up to a bright light will help you keep the overall skin thickness consistent. Dark spots indicate thicker areas. Be sure to plan ahead because you will want stressed areas such as wing saddles and gear mounts to be slightly thicker. Models that have few compound curves, such as a B-25, assemble faster and neater. Straight cuts allow the aircraft to be constructed in segments with the use of templates and a hot-wire cutter. A little practice might be needed to develop your hot wire-cutting skills, but the material is inexpensive.
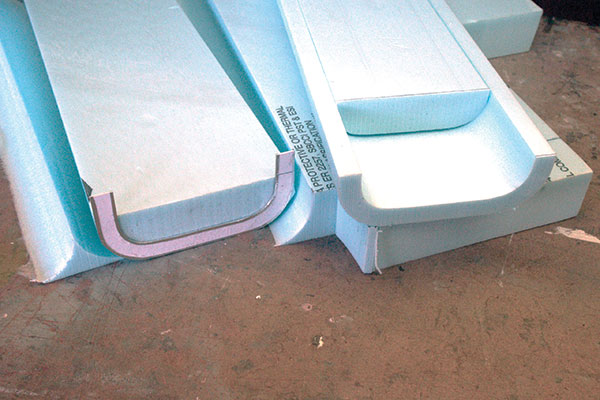
Templating. Templates for hot-wire cutting can produce identical parts with some preparation time. The drawback is that the cuts have to be straight, with no compound curves.
You start with a three-view drawing, which should have a few cross-sections to guide you in making the wire-cut templates. Good template material has three requirements: it should be stiff, easy to cut, and can withstand the hot wire contacting it. Applying aluminum tape to the edge of the template will expand your material possibilities—even thick card stock will work. Aluminum duct tape is available at home improvement stores. When you have cut your foam blanks, attach the templates to the ends with two-sided tape. Start by cutting the outside first because the slab will bow due to stress relief in the material. The inner cut is made with weights holding the material against the work surface to eliminate the bow. Cutting the inside will relieve the internal stress and eliminate the bow.

Slow and steady. You can use your fingertip to help steady the rotary tool while establishing the inner edge of the fuselage. Applying light pressure and making several passes is better than one heavy pass. A fan or vacuum cleaner near the cutting tool helps keep the work area clean.
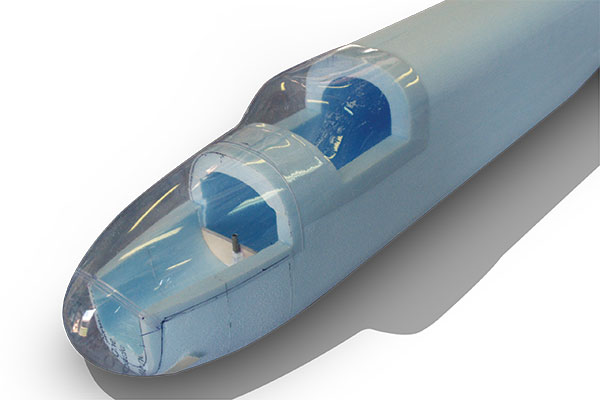
The fuselage segments are assembled with the centerline seam against the work surface to keep it true, then the halves can be joined to complete the fuselage. After a little light sanding to hide the seams, you are ready to apply your desired finish. With either method, you will find yourself holding a fuselage in a short amount of time. That is normally not a problem until you need a servo in a difficult-to-reach spot. Planning ahead before the fuselage halves are joined is the key to a successful design.
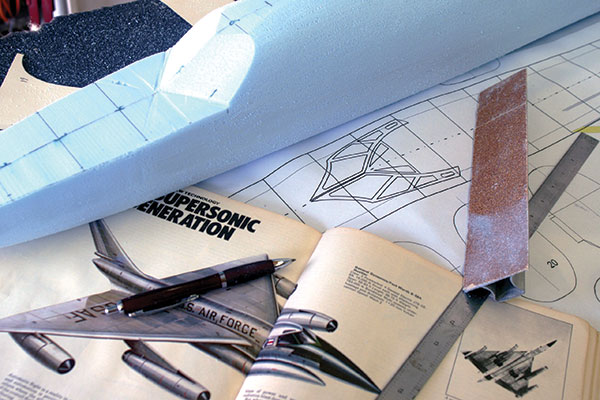
Check your work often. Keeping plenty of photos and drawings handy while you shape a fuselage is your best resource. Take a step back and view the model you are shaping from the same angle as the reference material.
Saving the foam scrap cut from the fuselage is useful for installing parts or supporting control hardware because it fits in the fuselage’s interior. In my book, Building with Foam, I cover other construction methods in depth and share how to get started. It is available for purchase at my website, which is listed in “Sources.” —Keith “Sparky” Sparks [email protected]
Sources:
Park Flyer Plastics [email protected] www.parkflyerplastics.com Model Aviation Digital Library https://library.modelaviation.comArticle: