

Written by Greg Gimlick Helicopters Column As seen in the Summer 2018 issue of Park Pilot.
>> The rear of your helicopter might not actually use a gear, but is it working? Our little machines are marvels of technology, but preventative maintenance is paramount to success. We tend to ignore the tail-rotor drive systems until there is trouble, and by then it’s often too late. The price for ignoring this is usually a crash. Let’s get ahead of it.
Types of drives
If you have several helis, chances are that you have an example of all of these types of tail drives. Each one serves its purpose well if it is properly maintained. • TT: Torque tubes drive the tail rotor with a shaft from the main gear to the tail rotor gearbox. It might be a wire, tube, or shaft made of plastic, carbon fiber, or aluminum, using a gear on each end. They provide the tightest tolerance and performance, but they require careful setup and are easily damaged if the tail rotor contacts the ground.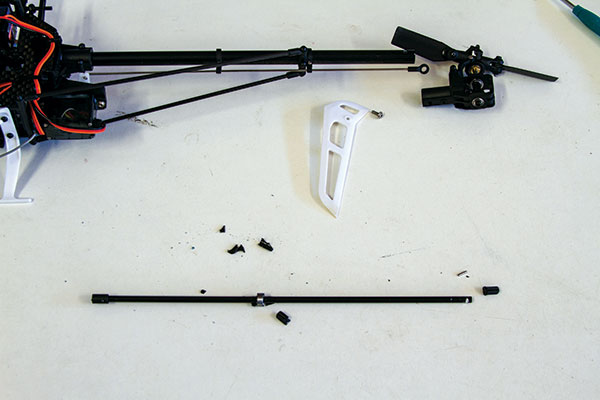
This is the torque tube from Greg’s Blade 180 CFX heli after it came in contact with the ground. The ends break off easily, but nothing else is damaged. A pack of two replacements is cheap and it takes 5 minutes to replace one. It is also self-aligning.
• BD: Belt drives were common for years and remain popular. It’s a simple setup, with the belt making a twist inside of the tailboom to change the direction of the drive without requiring gears. They are more forgiving when a beginner makes contact with the ground or tall grass, but they are still good for 3D flying and are used by some 3D experts. They require occasional tensioning and should be sprayed sporadically with silicon to reduce static electricity.

One of the things to check for on a belt-driven tail is alignment. This belt is running true down the center of the tailboom and centered on the gear.
• DDVS: Direct-drive variable-speed tail-rotor drive systems are now more common because dual speed controls can drive them efficiently. Some claim they still “blow out” during hard 3D maneuvers, but they are certainly capable of performing good 3D flight. They use a separate motor on the tail, driving fixed-pitch tail-rotor blades and providing anti-torque by varying the rpm. Simplicity and ease of maintenance make them popular.
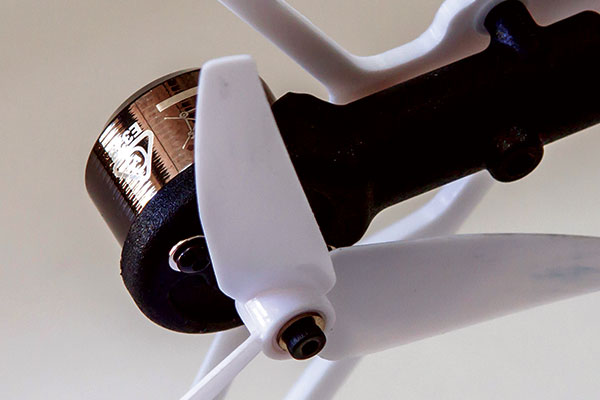
This direct-drive tail uses a motor connected to the blade. Check to make sure that the motor bolts and the blade retaining bolt are secure.
What is required to maintain a tail drive? Not a lot, but some attention is needed to ensure safe operation of your machine. Let’s begin with the easiest. DDVS tail-rotor systems have a motor mounted at the end of the tailboom that is connected directly to the tail-rotor blades. The wires run up the tailboom and connect to the control board or secondary ESC. These wires, depending on the motor/heli size, can be anywhere from 22 grams to tiny wires akin to motor windings. Check the connections and ensure that they are routed away from any gears that might chafe them.
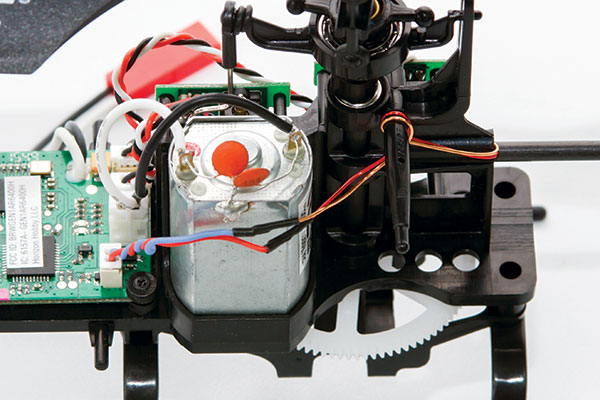
This small heli has a direct-drive tail. The tiny wires come through the tailboom and connect to the control board. They are routed and secured to avoid getting tangled in moving parts.
Turn the motor to see if it’s still smooth. After a flight, check the temperature of the motor with a temperature gun, log it, and occasionally check to see if it’s beginning to run hotter. That’s a sign of bearings going bad in the motor. Check the bolts and screws holding the motor to its mount, along with the security of the blades to the motor. TT tail drives require nearly perfect alignment and gear lash (spacing). The alignment is usually accomplished by single or multiple support bearings inside the tailboom. Replacement shafts for my Blade 180 CFX come with a bearing installed midway. They simply slide into the tailboom on the shaft to support and align it.
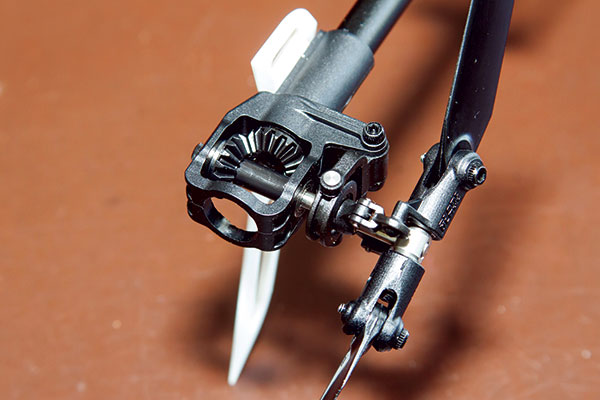
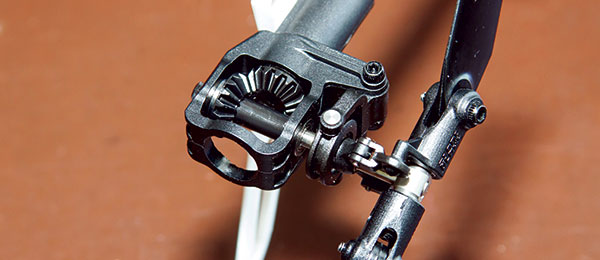
The tail-rotor gearbox of Greg’s Align T-Rex 450 Pro heli shows the aft end of the torque tube with the bevel gear. Alignment and proper lash are important on both ends.
The gear lash on the drive gears needs to be set so that it meshes properly but doesn’t bind. A gear that is too loose will often show curled edges from the shock of contact. Use a very thin piece of paper to set the lash. The shaft is a sacrificial lamb on most machines and cheap to replace. This protects the more expensive components when unexpected ground contact happens.
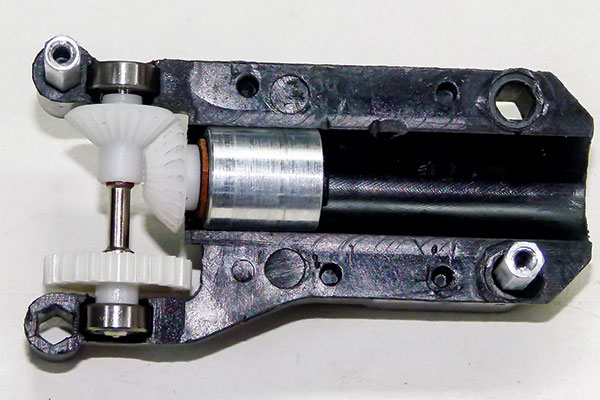
This cutaway view of the front end of a T-Rex 450 Pro’s tail-rotor drive shows how the front bevel gear off of the end of the torque tube meshes with another bevel gear on a shaft to the straight gear that is driven by the main-rotor drive train. It seems complicated, but it’s robust and solid when properly set up.
BD systems are simple affairs but require occasional care. They will loosen over time and need to be tightened by extending the tailboom in its mounts to take up the slack. There isn’t a magic formula, but you don’t want the belt so tight that it binds or so loose that it jumps the cogs on the drive gears. I change mine twice a season and give the new one a little bit of silicon spray to help prevent static electricity and condition the belt. When replacing the belt, ensure that you twist it properly to maintain proper directional control. Belts should be soft and flexible. If yours is getting hard or feels dry, replace it. Wrap-up: Maintaining your tail-rotor drive doesn’t take a lot of effort, but it’s extremely important that you give it some love. You might find that regular inspection and tuning will alleviate some of those gremlins that have been chasing you. Make inspections part of your overall maintenance routine. You’ll be glad you did. -Greg Gimlick [email protected]
Article:


