Written by Lucas Weakley
New Technology
As seen in the Summer 2020 issue of Park Pilot
Written by Lucas Weakley
New Technology
As seen in the Summer 2020 issue of Park Pilot
>> There is a group at Scaled Composites (scaled.com; see my Winter 2020 “New Technology” column for more information about the company) that likes to go Slope Soaring after work during the warmer months. I haven’t had a model aircraft fit for this type of flying, so it was my goal this winter to build an airplane for the hill.
 Using epoxy, Lucas embedded 6 x 1 mm carbon-fiber ribbon in the tailboom and in the vertical and horizontal stabilizers (see the Fall 2018 “New Technology” column). Make sure to do this on a flat surface.
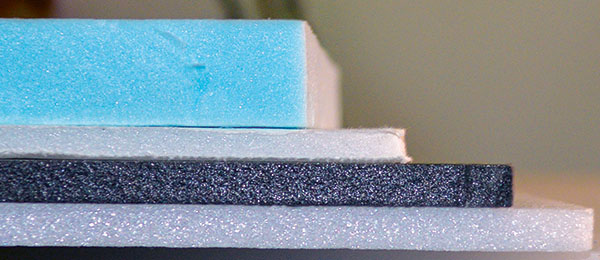
I decided to build an aerobatic, profile Slope Soaring glider based on the Le Fish glider by Steve Lange (free PDF plans: slopeaerobatics.com/le_fish.pdf). A quick YouTube search will bring up some impressive flying—and possibly a desire to build your own! I didn’t want a glider as big as his, so I designed my own based on the proportions of the Le Fish and adapted them for foam board. This column will focus on the construction of this foam board-based, profile glider. I’ll cover how I made a symmetric airfoil wing, shaped control surfaces, a contoured fuselage, and an integrated carbon-fiber pultrusion structure. This model will use several concepts that I’ve mentioned in past columns, as noted throughout the text. The techniques that I used to build this airplane are meant for non-paper-backed, semirigid foams (Summer 2018 column). I’m using Fli-Power Value XPS because I still have a box of it. Depron would work too, but because it was discontinued, RCFoam stopped selling both foams, so they’re hard to come by. An alternative that I’ve seen but have yet to try is Model Plane Foam (modelplanefoam.com), which is made by the same company that makes the Dollar Tree Readi-Board (dollartree.com) and Flite Test foams (flitetest.com). Much of how I built this model involved using a straightedge with an X-Acto knife to make straight cuts and steep bevels, and cutting curves by hand and sanding them to final shape. I’ve hesitated in the past with sanding foam-board models; however, if the design is made with the medium in mind, there isn’t much mess. The results are hard to achieve with other methods.
 Shown are the fuselage edges before and after sanding. This makes building complex curvatures easier because the initial cuts matter less.
The fuselage is made from three stacked sheets of foam, with the vertical stabilizer integrated on the central sheet. I used 3M Super 77 spray adhesive (3m.com; Fall 2019 column) to glue the fuselage panels together then sanded the outside edge until it had the contouring that I wanted. I used 80-grit sandpaper to rough out the shape, stepped through to 120 grit, and finished with 400 grit. This gave the foam a smooth finish. The control surface hinge bevels were cut with a straightedge, but the outside edges were sanded to create airfoils. I rounded the LEs (leading edges) of the vertical and horizontal stabilizers and sanded a shallow taper in the elevator and rudder so that the TEs (trailing edges) gradually thinned. After progressing through the sanding grits, I wrapped the TEs with packing tape to protect them. The hinges are all made from standard packing tape (Spring 2019 column). The wing is the most complex part of this sailplane. I wanted to make a folded-foam wing because this is one of the foam board’s strengths. But I also wanted curved wingtips and wing taper, which are sometimes hard to do on folded wings.
 Here are the internal wing bevels that allow the skins to be glued. The wingtips are cut to their rough profile.
 Before and after sanding the flat wingtips to their final shape. Any gaps in the LEs were filled with hot glue to keep them from separating.
I cut the wing section as it would be when finished and separated the top and bottom wing skins. I used a sanding block to taper the inside LEs and TEs so that when the foam is folded, the outside surface is continuous and there are inside, flat contacting surfaces to glue together. The wingtips are left unbeveled so that when the wing is folded, they will come together flat and can be sanded to final shape. The spar is a carbon-fiber tube with a diameter that is the same thickness as the foam. It slides into a foam channel that was made on one of the wing skins. The tube will later be glued in with epoxy. After using heavy-duty packing tape to join the top and bottom wing skins at the LE, Super 77 adhesive was used to glue everything together. While folding, I made sure to keep the airfoil symmetric. I then trimmed the TE to final size and wrapped it with tape to keep it together. The wing halves were weighed down to make sure that the glue had good contact. After the wingtips were sanded to final shape, ailerons were cut from the TE of the wing, beveled, and hinge-taped in place. I poked a hole in the fuselage for the spar to go through and assembled the model. With a bit of colored packing tape, the airframe was done! This aircraft still needs electronics (Summer 2019 column), but it will be ready to fly by the time it warms up in Southern California. I’ll post more details, flying footage, and possible plans on my website at lucasweakley.com. I hope this build inspires you to try out a new building technique and grow your model collection in the process!
Farewell: I’m saddened to announce that this will be my last “New Technology” column for Park Pilot. I’ve recently taken on responsibilities that make it difficult to devote the time needed to make this content. I’ve been writing for Park Pilot since the Fall 2014 issue, which surprised me too! It has been a joy to share what I know with you, and I hope this column serves to link you to several of the topics that I’ve written about. I want to thank the wonderful people at AMA for giving me this opportunity for so many years. I’m sure I’ll be around from time to time, but you can also find me on YouTube and on my website. Don’t be afraid to try something new, even if it crashes right after takeoff.
Hope to see you around the sky!
 Slope Soaring is an exciting facet of our hobby and is more accessible than you might think. Near where Lucas Weakley grew up in Florida, modelers could slope soar at beaches, small hills, or landfill parks.
By Lucas Weakley | [email protected]