

Park Solutions Article and photos by Bill LeBoeuf. Featured in the Spring 2010 issue of Park Pilot.
Sometimes we need to repair our airplanes, so I did a little Internet snooping for my Cessna 172. Several people had made repairs to the model’s plywood firewall and motor mount. One hard landing had taken out my Cessna’s nose wheel; the impact broke the lower section of the plywood firewall where the gear was attached. The next incident was a bounced landing, and that one caused the starboard side of the plywood motor mount to collapse. I had read about reinforcements and repairs done with carbon fiber and other exotic materials, but these are expensive and sometimes hard to use. Working with metal can be easy and inexpensive, and only requires a few basic tools. A piece of galvanized flashing material is strong, and easy to cut and bend. It’s inexpensive and can be found at your local hardware store. Only common modeling tools are needed, and a pair of tin snips is probably the only one you may not already have on hand. Round up two pairs of pliers, a flat file, an electric drill and bits, a pair of work gloves, a hammer and a square. Use a pencil to mark the cuts and bends. A rotary tool makes quick work of slots for bolt adjustments.
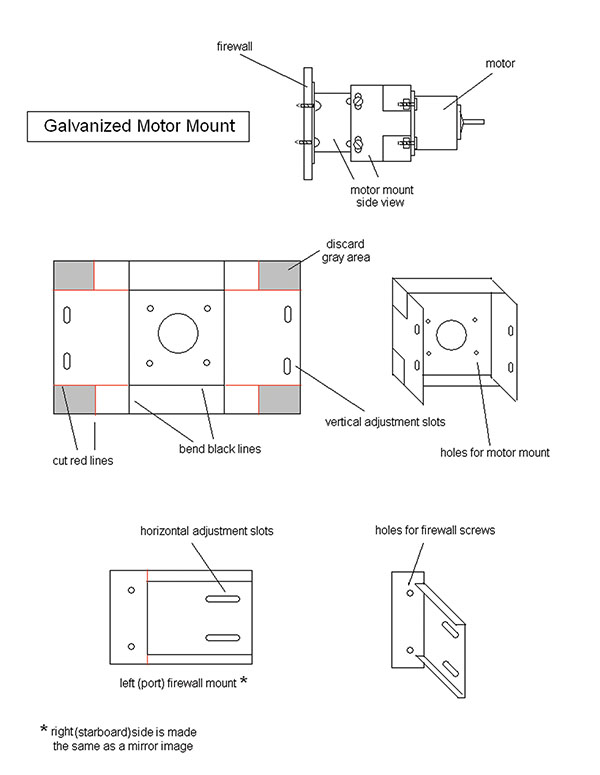
My first step was to reinforce the entire firewall with metal, cutting holes in the same places they were in the original part. Everything has to fit when it’s replaced. I used epoxy and screws to secure my new reinforcement over the model’s original firewall. I looked closely at several replacement motor mounts, but couldn’t find anything that would fit properly or adjust exactly right to match the original plywood mount. It took me far less time to make the replacement metal mount than I had spent in searching the Internet and visiting local hobby shops. Pieces of the broken plywood mount helped me get the dimensions, then it was easy to get the motor into the exact position and hit the perfect angle for the propeller shaft.
Bill’s Tips
• Wear gloves. Jagged, metal edges, sharp points and corners can cut your hands if you don’t protect them. • Use tin snips to make many small cuts along your bend lines. • Mark hole locations with a pencil. Use a center punch or a sharp nail to make a small dent to start each hole. This helps prevent the drill bit from skating. Use a block of wood under the metal when you punch and drill. • Hold the part with one set of pliers on the bend line, and bend a few degrees at a time with the other set. Move the pliers along the line until you’ve bent the whole line. • Plan ahead. Decide which bend to make first so you don’t have to unbend and re-bend overlaps. • Flatten slightly bent pieces by hammering against a flat surface. • File edges smooth, and round all sharp corners that could cut you. • Spray the finished mount with a thin coat of flat black lacquer. • A small adjustment may be required to reset your airplane’s CG.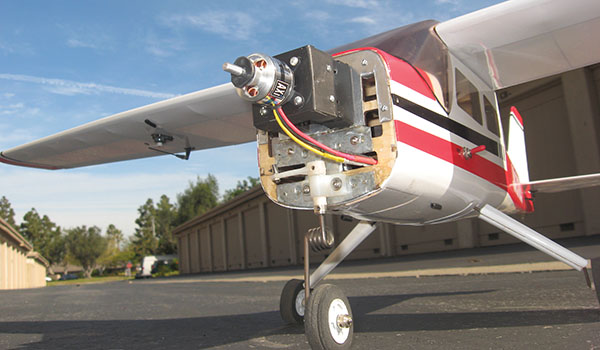
Article:


